I have recently started working at a preschool. Last week I attended a Teacher Training Program that featured all the teachers from across the city. What a great learning experience... and the entire credit goes to our dear trainer who planned and implemented it so well!
First things first. She started with name tags. We all had to prepare our name tags from home making them as creative as possible. Then the name tags were used as icebreakers in the training session, as a result of which happened a lot... Introductions, conversations, discussions, even group formations. Its incredible what wonders a little name tag can do! Someone made a little paper frog, someone came with name written on a colourful butterfly,on a quilled peacock, on seashells, and the list goes on..... How and what you create has a lot to speak about you as an individual.
I wanted to create something unique and relevant, that would not just be a name tag, but would tag me in the memories of a lot of people. And it did :) After a lot of brainstorming, this is what I came up with. Have a look:
A little slate (used as the name tag) attached with a pencil. Its a cute DIY project I will share with you today.
Materials used:
cardboard coloured papers
paints popsicle sticks
skewers beads
glue a piece of foam
ribbon pencil
scissors
Steps:
Name tags can be worn in the form of a badge (pinned), sticky or as an I-card with a lanyard. I prefer the lanyard as it makes the name tag last atleast for the training period if not more. Lol!
If you find this post helpful, please lemme know in the comment section. You know what, I'll be elated. :)
Thanks for stopping by!
First things first. She started with name tags. We all had to prepare our name tags from home making them as creative as possible. Then the name tags were used as icebreakers in the training session, as a result of which happened a lot... Introductions, conversations, discussions, even group formations. Its incredible what wonders a little name tag can do! Someone made a little paper frog, someone came with name written on a colourful butterfly,on a quilled peacock, on seashells, and the list goes on..... How and what you create has a lot to speak about you as an individual.
I wanted to create something unique and relevant, that would not just be a name tag, but would tag me in the memories of a lot of people. And it did :) After a lot of brainstorming, this is what I came up with. Have a look:
Materials used:
cardboard coloured papers
paints popsicle sticks
skewers beads
glue a piece of foam
ribbon pencil
scissors
Steps:
1. Cut the cardboard into a rectangle and cover it with black paper for the slate. Make the border with popsicle sticks and create the abacus by adding beads in the skewers/toothpicks and paste on top of the border. I also added a small piece of foam to make the duster and a small piece of toothpick to make the chalk! Cutest li'l additions....
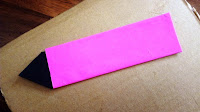
2. Now cut another piece of cardboard in the shape of a pencil and cover it in coloured paper of your choice. I chose writing the "Keep calm and teach on" quote on the pencil along with the logo of the school I work for. The logo has been painted in the exact shades.
3. Now, attach the slate and the pencil (in tilted position) together with glue and add a ribbon to make the lanyard. Finally, write your name (proudly) on the slate ;)
If you find this post helpful, please lemme know in the comment section. You know what, I'll be elated. :)
Thanks for stopping by!


This was so innovative :) liked the idea & the execution, would definitely give it a try..proud of u my girl
ReplyDeleteThanks a lot! I am glad you liked it. If you try it, please do share! It'll be great to see it....
DeleteThis was so innovative :) liked the idea & the execution, would definitely give it a try..proud of u my girl
ReplyDeleteThis is beautiful!! very very innovative!
ReplyDeleteThanks so much Surekha!
DeleteGreat work!
ReplyDeleteVery unique and interesting... Keep them coming
ReplyDeleteThanks for encouraging😃
DeleteWow, creativity at it's best! Loved it!
ReplyDeleteThanks dear! Really appreciate it....
DeleteWhat is an outstanding post! “I’ll be back” (to read more of your content). Thanks for the nudge! Custom Patch Maker
ReplyDelete