Tuesday, 21 June 2016

Famous Favourite Faces! (DIY Audio Cassette Cover Collage)


Remember those audio cassettes you played in your childhood over and over again? Do they remind you of those glorious golden days? Spending all the pocket money buying the latest ones and still yearning to get more... No CDs or pen-drives available today can ever match that fun, no matter how compact they get!

After recently shifting to Pune, while fiddling around with stuff I found this big box of old audio cassettes. What nostalgia... what memories...
they looked so amazing with their original album covers, almost vintage! When a glance at them could bring a smile on my face, why not see them more often and smile more, I thought... I was anyways doing up the new house and immediately decided to use them 'somewhere'. I also had a nice wooden frame that needed to be used 'somewhere' too. In no time, I came up with the idea of a recycled wall art. So, 'somewhere' had to be this:

A vintage collage created out of old audio cassette covers! A musical addition to your home decor. All the favourites visible at one place...how pleasing! When all of them were put together, it looked much nicer than I thought. Look at the finished product....


Made in three easy steps:
1.  Create a base. I pasted wooden vinyl sheets (you can use sun-mica also)  on a cardboard sheet. The base is ready. A wooden base looks great but as an alternative, you can use handmade paper or whatever you like. 

2. Using a strong adhesive, paste all your favourite cassette covers (cassettes were removed and kept safely) together on the base aligning them properly. (You can also make the collage using CD covers)


3. Now get this framed! I already had a wooden frame that I pasted and fixed onto the base. You can even create your own frame. Get innovative!

Make one for your room and you will love it! I have placed mine in the living room...my guests get immediately blown away with it!

Thanks for your visit...
Happy Crafting :)


Tuesday, 14 June 2016

Daddy finger! Daddy finger! this one's for you :D (Father's Day crafts)


Hey everyone!


Father's Day is just around the corner... Wanna make your dad feel special and don't know what to do? A surprise? How about creating some handmade gifts for him this time.... Remember, dads are rich :) they don't need expensive gifts from us. And I personally feel that handmade is always special. 


Now some of you would say that you suck at creativity :(  But that's okay... There's also a flip side to it. For those who are naturally artsy crafty, a handmade gift is a 'regular thing'. But for those who are not, it's an extra effort made which makes it even more special! So let's get going... handmade gifts for the man who always holds your hand like no one else does!


If little children are making these crafts, mommies please help (you will be rewarded on Mother's Day!)


We are making:


1.  A greeting card - Dress up your dad for his special day. A card to 'suit' him. I have used white paper for the shirt, a printed paper for the coat and a few little accessories, a tie, a hankie, a pocket watch and two buttons. You may create what you like. Just get tailoring :) and then add your message and done!


2.  A mouse pad - A simple and useful gift for your dad. That's a green foam sheet that has been transformed into a football ground (dads love soccer). Just use white acrylic paint and let it dry. Your mouse pad is ready. How cool is that...


3. A photo frame - That's a cute recycled project. Start with a plastic CD cover. On the front side of the cover, paste any old blocks to make the frame. Use toy alphabets for the the caption on top of the frame. You could also use a foam sheet to cut out the alphabets for the caption. The frame is  ready to go! Just paste your dad's picture and it will come to life! What say....


If you decide to make any of these, do share with me. And believe me, Crafting isn't rocket science!


                 Would love to end this post with a Kodak moment :)

Me and my Dad (Always an inspiration)


Thursday, 9 June 2016

What's in a name...its in the name tag! (DIY Creative Name tag)

I have recently started working at a preschool. Last week I attended a Teacher Training Program that featured all the teachers from across the city. What a great learning experience... and the entire credit goes to our dear trainer who planned and implemented it so well!

First things first. She started with name tags. We all had to prepare our name tags from home making them as creative as possible. Then the name tags were used as icebreakers in the training session, as a result of which happened a lot... Introductions, conversations, discussions, even group formations. Its incredible what wonders a little name tag can do! Someone made a little paper frog, someone came with name written on a colourful butterfly,on a quilled peacock, on seashells, and the list goes on..... How and what you create has a lot to speak about you as an individual. 


I wanted to create something unique and relevant, that would not just be a name tag, but would tag me in the memories of a lot of people. And it did :) After a lot of brainstorming, this is what I came up with. Have a look:


 A little slate (used as the name tag) attached with a pencil. Its a cute DIY project I will share with you today.

Materials used:
cardboard                                 coloured papers
paints                                       popsicle sticks
skewers                                    beads
glue                                         a piece of foam 
ribbon                                      pencil
scissors
Steps:
1.   Cut the cardboard into a rectangle and cover it with black paper for the slate. Make the border with popsicle sticks and create the abacus by adding beads in the skewers/toothpicks and paste on top of the border. I also added a small piece of foam to make the duster and a small piece of toothpick to make the chalk! Cutest li'l additions....


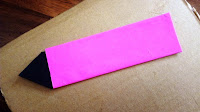
2.   Now cut another piece of cardboard in the shape of a pencil and cover it in coloured paper of your choice. I chose writing the "Keep calm and teach on" quote on the pencil along with the logo of the school I work for. The logo has been painted in the exact shades. 


3. Now, attach the slate and the pencil (in tilted position) together with glue and add a ribbon to make the lanyard. Finally, write your name (proudly) on the slate ;)


Name tags can be worn in the form of a badge (pinned), sticky or as an I-card with a lanyard. I prefer the lanyard as it makes the name tag last atleast for the training period if not more. Lol!

If you find this post helpful, please lemme know in the comment section. You know what, I'll be elated. :)

Thanks for stopping by!